

How to print in Autocad in the design according to the scale and without frames or the copy
1. Prepare the image that will be printed on the model.
2. Verify or specify the unit used in the model drawing. The trick in the command can write the units command and then enter. In the Drawing Units dialog, section insertion scale, see or select the unit that will be used. For example, use meters.
Note: You can choose the unit, the important thing is to know what unit you choose because it will affect the value of the print scale.
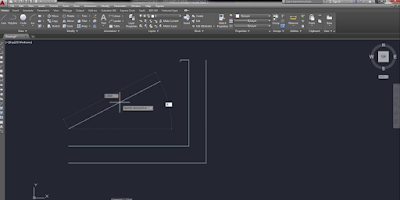
3. Click the Layout1 or Layout2 tab. Click on the box line that has an image or you can also press Ctrl + A on the keyboard. Then press the delete key on the keyboard.
4. Right click on the active design tab. Select the page configuration administrator. For clarity, see the following image.
5. In the page configuration setting dialog box, click on the Modify button.
6. In the page configuration dialog box, make the following configuration.
In the Printer/Platterter section, select the name of the printer that will be used. If you don't know what a printer use, you can first select DWF6 ELLOT.
In the paper size section, select a paper size. For my example, I chose ISO expanding A3 (297.00 x 420.00 mm).
In the section of the plot scale, select mm and filling unit 1.
In the drawing orientation section, select a paper orientation. For the example, I chose the landscape option.
For the rest, leave it as it is and the results of the configuration I do, seem the image below.
If set as shown above, you can click OK.
7. In the page configuration setting dialog box, click on the Close button.
8. For how to create a graphic window in the design of Autocad, in the command write the MV command and then enter. Or if you are using a classic work space, you can also click on the view menu> Views> 1 viewport.
9. Draw a box how to make a rectangle within the design of the dotted line according to the desired size. Or if you want the picture to be as great as the paper, in the command you can also write Fit and then enter.
10. To adjust the scale, double click on the box that has been created.
Note: If the image does not appear in the middle of the picture, in the type of Z -Enter> E> Enter command.
11. Click the view scale to select the scale to be used. Location of the view scale See the red box in the image below. And for the example I choose 1: 100
Grades:
The 1: 100 scale is the view scale. Not the real scale on the ground.
To find out the real scale, the paper distance unit must be compared to the model of model image distance (paper unit: model drawing unit).
For example, the paper unit that uses is mm (step number 6) and the drawing unit of the model I use is meters (step number 2).
Then, when I select the scale of the 1: 100 graphic window, it means 1 mm: 100 m or if the unit is 1 mm: 100000 mm (1 m = 1000 mm). This is the true scale of 1: 100,000.
12. To finish the scale, double click outside the box.
13. To print or print a ready -to -design image, you can click on the File Menu> Draw or press the Ctrl+P keys on the keyboard.
14. In the plot dialog box, you must establish only the name of the printer that will be used for printing. But if step number 6 has been carried out, there is no need. Then you can click on the Preview button to see a general description of the printing results that will be obtained.
15. If the results agree with the desired image, right click. Select graphics.
If it does not match, right click, select leave. Or you can also press the exhaust key on the keyboard. Then, make changes in the configuration in the Plot dialog box as you want. This is how to establish the design of Autocad and how to print AutoCAD to fit the scale.
How to print in AutoCAD in design with frames and scale
1. Perform steps 1 to 7 How to print AutoCAD in the design according to the scale and without frame or headed above.
2. Create Marcos in the design in several ways. You can design from scratch, copy from drawings of the model, insert frames in the form of blocks and copy from ready design drawings.
For example, I will copy the framework from the default value

No comments :
Post a Comment