

How to draw lines in Autocad for beginner
To practice this Basic AutoCAD tutorial, you can use any version of Autocad, because this line drawing is included in the basic autocad functions. From the initial version of Autocad to version 2020, the command or command remains the same.
How to draw free lines
- AT Type of line or l command, then enter.
- On the Autocad drawing screen, left click anywhere you want.
- Move the cursor using the mouse to the right, to the left, up, down or wherever I want it yet on the drawing screen. Then click on the left again.
- If you still want to continue creating the line, point to the cursor again wherever you want. Then click on the left again.
- To finish the line, press the exhaust key on the keyboard. Then, the AutoCAD drawing screen will form a recently created free line drawing.
How to draw free lines of a certain length
- AT Type of line or l command, then enter.
- On the Autocad drawing screen, left click anywhere you want.
- Move the cursor to another part of the AutoCAD drawing screen, then write a certain length (for example, 10), then enter.
- To finish how to draw free lines, you can press the exhaust key on the keyboard or press enter.
How to draw a line using coordinates
- AT Type of line or l command, then enter.
- In the command, write the coordinates of the first point. For example, income 635354,1880066 and then income.
- 3. In the command, write the coordinates of the second point. For example, income 635402,1880077 and then income.
- If there is a third coordinate point, etc., take the third step again. If not, press the Enter or Exhaust key on the keyboard to finish the creation of the line.
- If the drawing is not visible in the middle of the autocad screen, then in the type of Z command, enter, write E and then enter.
- To add a reference on how to draw in AutoCAD using coordinate data, also read how to draw a field using coordinates
How to draw a line to connect two specific points
When drawing in Autocad, we sometimes want to draw an existing 2 points. To get an example, see the image below. I want to draw a line from point 1 to 4 and point 2 to 3.
Before taking the steps below, make sure the Snap mode for the end point is active so that, when left, the point can be necessary. How: Click the Tools Menu> Writing Settings ...> Click the Object Snap tab> Make sure the final point box is marked> Click OK.
Steps to make the line:
1. AT Type of line or l command, then enter.
2. Click on the end of the first point plane.
3. Click on the end of the fourth point of point.
4. Press the exhaust key on the keyboard to finish line creation.
5. Repeat step 1 to step 4 up to make a line from point 2 to point 3.
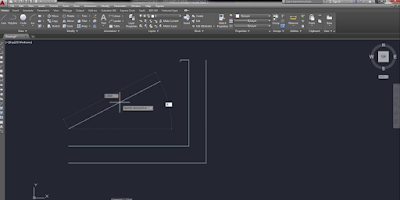
How to create a line with a specific angle and length
1. AT Type of line or l command, then enter.
2. On the Autocad drawing screen, left click anywhere you want.
3. Move the cursor to the upper right of the point made in step 2 until the angle is as large as we want (for example, 45 degrees), then write a certain length (for example, 30), then enter. To be clearer, see the image below.
4. Press enter or escape to finish the drawing of the line.
How to draw a line with coordinates, azimuth and a specific length (polar coordinates)
To put this tutorial into practice, let's use the sample data below:
Coordinate point A = 635400,1785100
AB length = 100 meters
Azimut ab = 60d50'10 "
The first step to create a line from the previous data is to establish the drawing units and management control, how:
1. Click the Format menu. Then select units or you can also write units in the command.
2. In the Drawing Units dialog box, make the following configuration.
In the length section. Write select decimal and precision Select 0.00
In the angle section. Write Select Deg/Min/Se | Precision Select 0D00'00 ”| Make sure the box is marked.
On the insertion scale, select meters.
Click the Instructions button. In the steering control dialog box, in the base angle section, select to the north. Then click OK.
Click OK to finish the configuration of drawing units.
The results of

No comments :
Post a Comment